Real Estate Ops Walkthrough: Automating Transaction Task Tracking with Airtable, Part 2
Last updated October 2023
In part 1 of this walkthrough, we set up a basic task tracking system which allowed us to manually input tasks, assign owners, and link tasks to the transactions they’re related to. Now, let’s get to the real magic: ✨Automation✨
See this tutorial in video form here:

Step 1: Setting up the “📝 Task Templates” Table
Now that we have a place to track actual tasks, we need a place to configure the tasks that will be auto-generated in the future. We’ll call this table “📝 Task Templates” and it will hold the “example” tasks that get copied into the “✅ Tasks” table when a particular deal changes stage.
To start, our “📝 Task Templates” table couldn’t be any simpler:
If you went through part 1, this should look familiar — it’s just a simplified version of our “✅ Tasks” table.
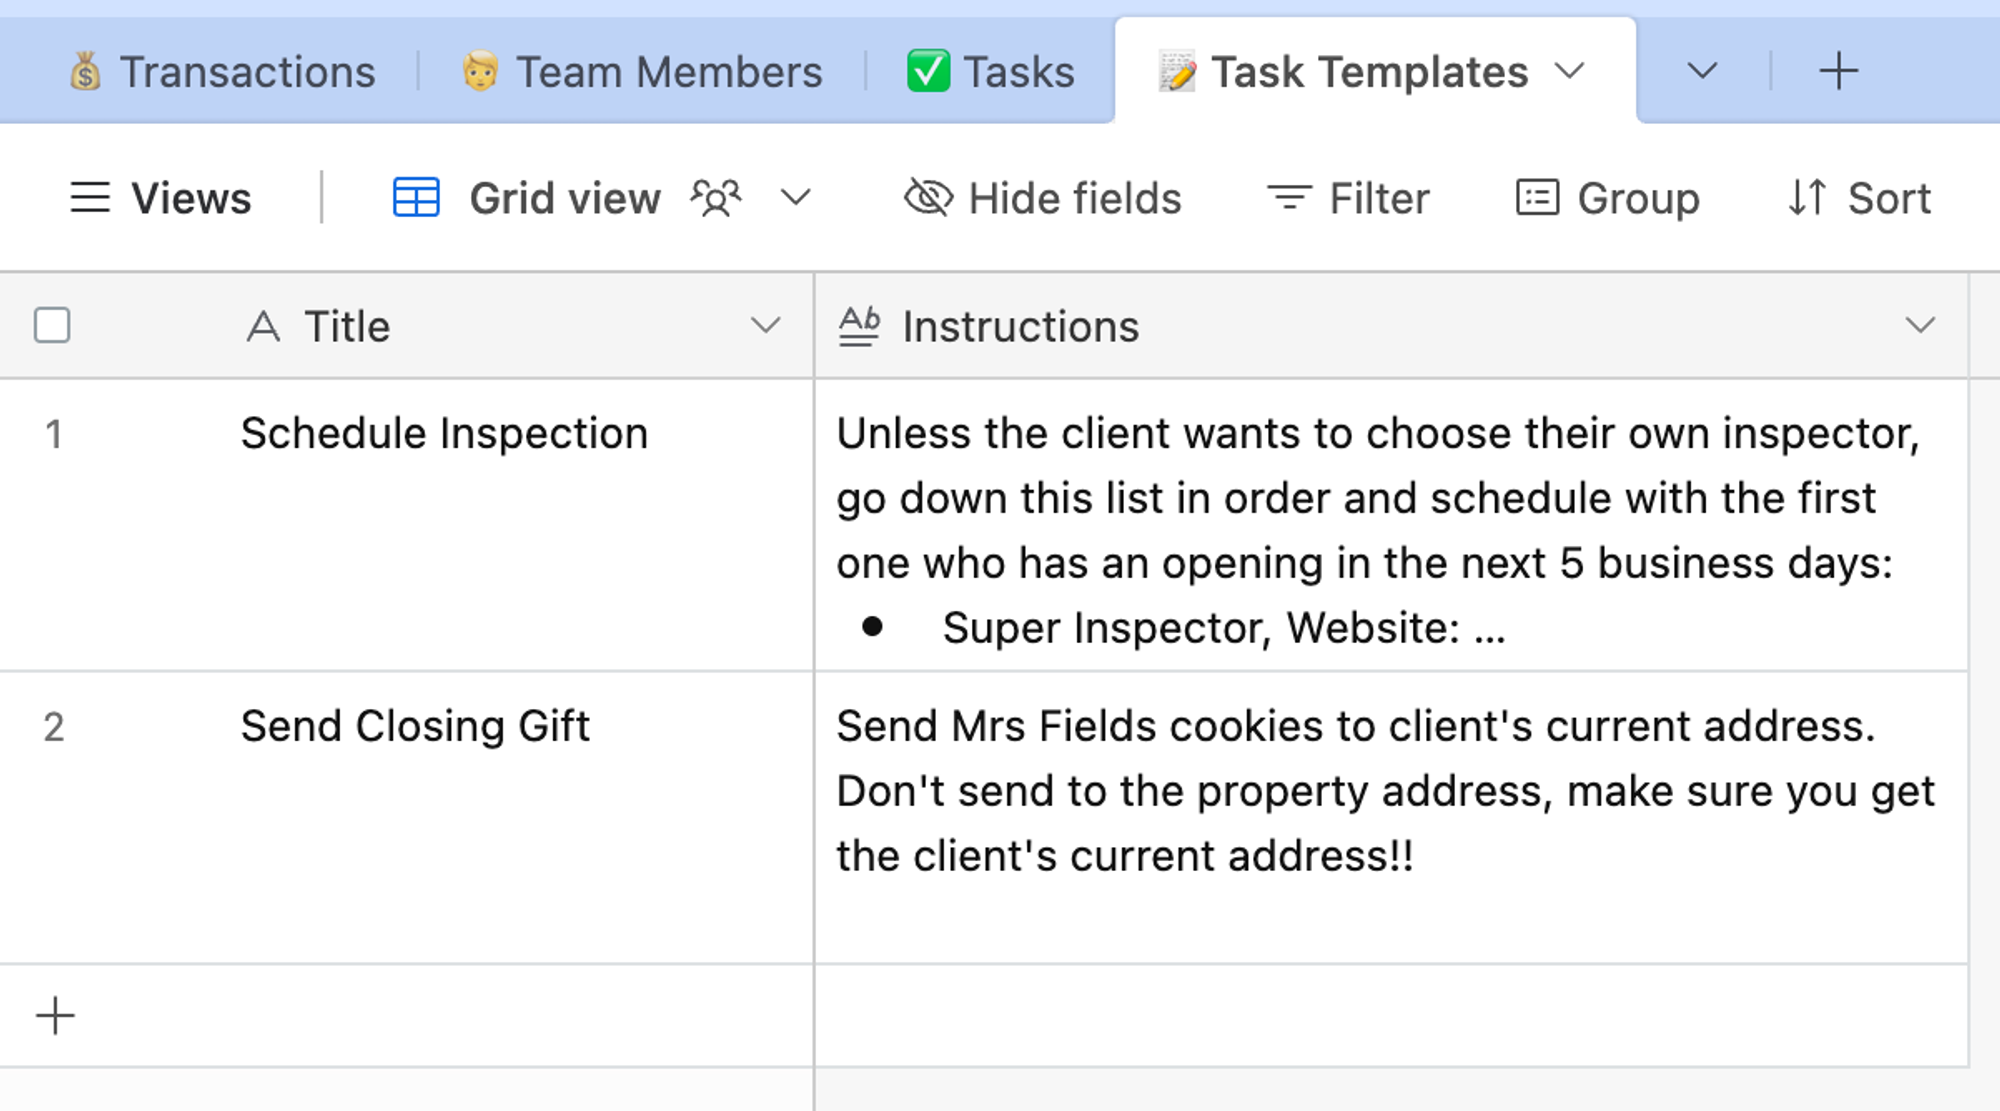
To start we have just 2 columns:
- Title
- The value that will be copied into the “Title” field when we create a “✅ Tasks“ record
- Instructions
- The value that will be copied into the “Instructions” field when we create a “✅ Tasks“ record
There are just a couple of crucial pieces of missing information in this table:
- The deal stage at which we want this template to spawn a task for the transaction
- The Client Type (e.g. Buyer, Seller, Landlord, Tenant) for which this task should apply
So let’s add these two columns! We’ll add “Deal Stage” and “Client Type” columns as single-select fields to this table. It is crucial that the options for these fields exactly match the options stored in the “Stage” and “Client Type” fields on the “💰 Transactions” table
Let’s set up the “Client Type” field first:

Again, make sure that these options exactly match the values in the “Client Type” values in the “💰 Transactions” table. (“Buyer”, “Seller”, “Landlord”, “Tenant”).
Even mismatched upper/lower case letters or extra spaces at the end of an option can cause this to not work as expected! You don’t need to worry about making the colors match though. We usually like to use Uppercase with single space for select options like this for consistency
Now, the same thing with adding the “Deal Stage” field: its options need to exactly match the options for the “Stage” field in the “💰 Transactions” table. This one is a little more involved, so I like to keep each table open in a different window side-by-side so I can copy/paste the values out of the “💰 Transactions” table:

Now, one last thing before we’re ready to set up our automation! Let’s fill in these new columns for one of the example task templates we already have. This will allow us to test the automation against a real example. From part 1 of this tutorial, we already have a “Schedule Inspection” task. This is probably for buyer clients and should be planned once they go under contract. So let’s set those fields:
Step 2: Configuring the Automation 🤖
Now it’s time to set up the automation that will generate tasks for deals as they progress through different stages! This is where it all comes together.
Let’s navigate over to the “Automations” tab and create a new automation called “Generate tasks when Transaction changes stage”
If you need an overview of how Airtable Automations work, check out this excellent explanation by GAP Consulting
For this example, we’ll use the “When a record is updated” trigger. Note that there are some downsides to this (especially if you are intaking your transactions through a form or automation), but this will work for now.
Now, remember, we want to generate tasks whenever a Transaction changes stage. This means that I’ll be setting up the automation to watch the “💰 Transactions” table, and specifically looking for updates to the “Stage” field:
Now it’s time to configure the actions! For this, we’ll need to do 2 steps:
First, we need to look into the “📝 Task Templates” table and find all of the task templates that we want to generate. These are all of the task templates with the same “Deal Stage” and “Client Type” as the transaction. In other words, When a buyer transaction changes to “Under Contract” we need to find all of the “📝 Task Templates" where “Client Type” = “Buyer” and “Deal Stage” = “Under Contract”
Here’s how we configure this step:
Woah, that might have looked like a lot of steps, so let me break it down:
- First, we give the step a name “Find matching Task Templates”
- Next, we specify the table that we want to find records in — remember we are looking for all matching task templates, so we look in the “📝 Task Templates” table
- Then, we tell it how to pull out the right records from that table. For this, we’ll configure 2 conditions:
- 1. The task template’s “Deal Stage” value is the same as the Transaction’s “Stage” value
- 2. The task template’s “Client Type” value is the same as the Transaction’s “Client Type” value
Note that we had to select “dynamic” from the little settings wheel to the right of each condition. This is how we get Airtable to base it on variables from previous steps of the automation (in this case the trigger).
Okay, now we’ve pulled all of the matching task templates. Now there’s just one more thing left to do: let’s create tasks for each of the matching templates!
For this, we’ll use Airtable’s “Repeating Group” automation feature. This allows us to perform a set of steps on each element in a list. Remember, we might have matched 50 or more tasks in the “📝 Task Templates” table, and the repeating group allows us to tell Airtable to create a task for each item in that list.
Now, it’s time to actually set up the action that will create the records in the “✅ Tasks” table. For this, we’ll configure a “Create Record” action inside of the repeating group that we just configured. We will set 3 fields on each newly created task:
- “Title” and “Instructions” will be directly copied from the task template (which is referenced as “Current Item” inside of the repeating group).
- “Transaction” will be set to the record ID of the transaction that triggered the automation in the first place (i.e. the transaction that is changing stage, which we are generating the tasks for)
This automation should now work for auto-generating tasks as our transactions move through the pipeline. All that’s left to do is to turn on our automation and test it end-to-end!
To do this, we will:
- Turn on the automation
- Create a new Transaction record
- Check to see that tasks are generated for that record
- make sure that you set the “Client Type” and “Stage” fields on the test transaction to values for which you have “📝 Task Templates”” that will match. In my case, I’ll set this new record to Client Type: “Buyer” and Stage: “Under Contract”

And there we have it! An automated system to generate task
And there we have it! An automated system to generate tasks for deals as they move along the pipeline! We can now configure more task templates to fill out our whole workflow!
Where do we go from here?
There are all kinds of things we can do to improve this task-tracking system, such as:
- Automatically filling out a task’s “Owner” field based on the role marked in a task template
- Protecting the system from accidentally creating the same task multiple times if the stage is changed back and forth
- Adding a “Status” field to the “✅ Tasks” table
- Adding due dates for tasks
- Sending automated email alerts when tasks are overdue
- Putting the most important tasks onto the task owner’s Calendar
The list goes on and on!
By the way, these are the types of systems that we build for real estate teams all the time! You can schedule a free 30-minute call with us by filling out this form.
Thanks for reading Deal Ops Automation! Subscribe for free to receive more expert automation tips and walkthroughs just like this